We ship across the U.S. and Canada. Visit our showrooms in Atlanta, Tampa and Naples and Nashville!
Choosing glass entry doors is not merely a style decision. It affects daylight, comfort, security, maintenance, and the first impression of a home. A clear panel can make a narrow hallway feel wider. However, the same panel may expose fingerprints, street noise, or unwanted heat.
The U.S. Department of Energy reports that windows can account for 25–30% of residential heating and cooling energy use. Glass entry doors deserve similar attention, especially when they face strong afternoon sunlight. NFRC certification helps buyers compare U-factor and solar heat gain performance. ENERGY STAR guidance also emphasizes properly rated products, professional installation, and climate-appropriate glazing. These details matter more than attractive showroom lighting.
Building-science expert Dr. Joseph Lstiburek often states, “A building is a system.” That principle applies directly here. The door, frame, sill, weatherstripping, wall, and drainage path must work together. A highly insulated glass panel cannot compensate for a poorly sealed threshold. Sometimes, the overlooked parts fail first.
This guide presents 10 practical tips for choosing glass entry doors. It examines glass type, privacy, energy performance, frame materials, hardware, safety glazing, weather resistance, accessibility, installation quality, and long-term care. Expect useful comparisons, but not perfect answers. A coastal home, a shaded townhouse, and a sun-facing desert entrance need different solutions. Measure twice. Question impressive claims. Select a door that performs well after the welcome moment has passed.
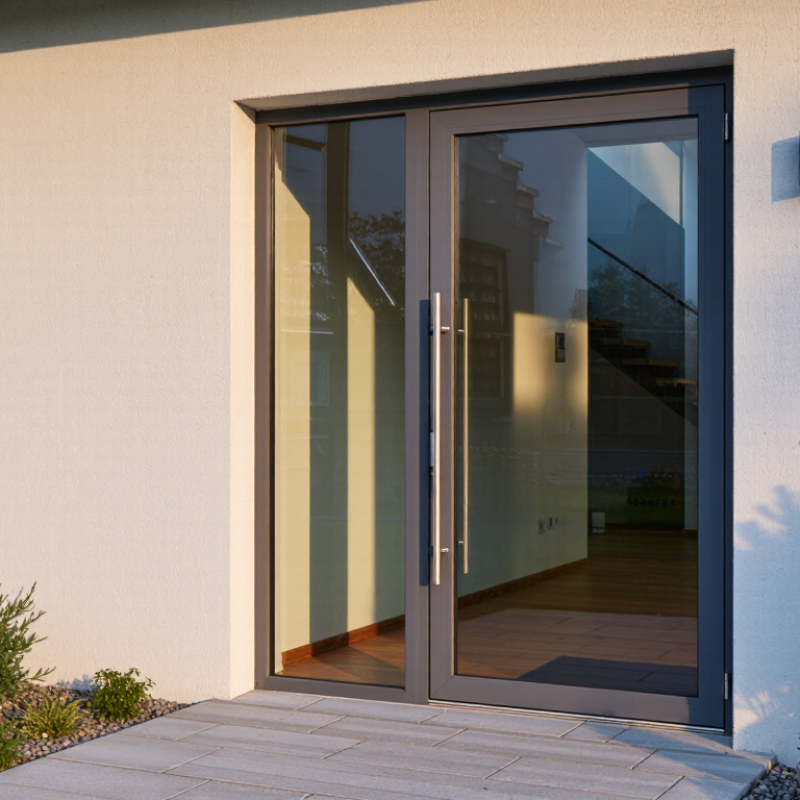
Choosing a glass entry door starts with the opening, not the frame style. Measure the finished jamb-to-jamb space after flooring, trim, and weather seals are installed. The U.S. Access Board’s 2010 ADA Standards specify a 32-inch minimum clear opening for accessible doors. That is clear passage, not slab width. A 36-inch leaf may still lose space to hinges, stops, and hardware. This distinction is often missed.
Tip: Draw the swing on the floor with painter’s tape. Check furniture, stairs, and landing space before ordering. An outswing can protect interior circulation, but local egress requirements may change the decision. Verify the applicable code with the project professional.
Tip: Treat the threshold as a measured transition. The ADA Standards limit thresholds on accessible routes to 1/2 inch, with beveled edges above 1/4 inch. ICC A117.1 also emphasizes maneuvering clearance and usable hardware. Confirm slab height, drainage slope, and sill details together. A low threshold can still collect water. Record the final clear width after installation. Photographs help. So does a second measurement. The glass may look perfect, yet the opening can remain difficult for a wheelchair or walker.
Choosing a glass entry door starts with safety, not appearance. Ask for safety glass that meets CPSC 16 CFR 1201 and ANSI Z97.1. These standards address impact performance and help reduce dangerous breakage. Request the test documentation, not only a sales statement. Check whether the glass is tempered or laminated, and confirm its thickness suits the opening.
Inspect the safety glazing label before installation. It should identify the manufacturer, standard, and certification information. Measure the doorway carefully, including the frame, hinges, sidelites, and nearby panels. Confirm that every hazardous location uses compliant glazing. A beautiful door can still create a risk if one narrow sidelite is overlooked. Look for polished edges, secure seals, and hardware designed for the glass weight.
Installation matters just as much as specification. Use a qualified installer who understands glass clearances, setting blocks, and weather exposure. Ask how the door will perform near children, pets, bicycles, or heavy foot traffic. I once focused too much on the glass pattern and ignored the surrounding frame. That shortcut was a mistake. Also review local building requirements, because safety standards do not replace installation rules. Keep copies of product records and inspection notes. Small details matter. Recheck the label after fitting, since it may be hidden by trim or sealant.
Select safety glazing identified as meeting applicable requirements of CPSC 16 CFR 1201 and ANSI Z97.1. The chart compares the two CPSC impact-test categories used for architectural glazing.
CPSC 16 CFR 1201 uses a 100-pound impactor. Category I corresponds to a 150 ft-lb impact test, while Category II corresponds to a 400 ft-lb impact test. Always verify the product label, installation location, and applicable building-code requirements; ANSI Z97.1 may also be specified for safety-glazing performance.
Choosing glass entry doors starts with two NFRC ratings: U-factor and SHGC. U-factor measures heat transfer through the glass and frame; lower values usually improve insulation. SHGC measures how much solar heat enters. Lower SHGC suits hot, sunny climates, while moderate SHGC can help warm south-facing entries in colder regions. The U.S. Department of Energy reports that windows can cause 25–30% of residential heating and cooling energy use.
Tip 1: Compare complete-unit ratings, not glass-only claims. NFRC labels evaluate the assembled product, including framing and spacers.
Tip 2: Match SHGC to orientation. A west-facing door may receive harsh afternoon sun, even in a mild climate.
Tip 3: Check air leakage. A low U-factor cannot fix a poorly sealed threshold. Small gaps matter.
The right balance is rarely obvious. I would not choose the lowest U-factor automatically. In a shaded, heating-dominated home, SHGC may deserve more attention. In a bright entryway, glare and fading also matter, although ratings do not fully describe them. NFRC certification data offers a reliable comparison, but installation quality remains a practical weakness. Ask for the product’s exact NFRC label, visible-light transmittance, and tested air-leakage value before ordering.
A glass entry door should be judged by tested performance, not appearance alone. Use AAMA/WDMA/CSA 101/I.S.2/A440-22, commonly called NAFS, as the technical reference. Ask for the exact product’s laboratory report, including its tested size and configuration. A larger door may perform differently. That detail is easy to miss.
Check air leakage at 75 Pa, water penetration pressure, and structural wind pressure. Confirm the door’s performance grade and product class match the building exposure. Coastal, high-rise, and storm-prone locations need more careful review. Inspect the weatherstripping, corner seals, sill pan, and glass-to-frame joints. Request installation instructions, not only performance labels. Water testing without correct installation can create false confidence. I have seen attractive doors fail at the sill.
The U.S. Department of Energy reports that windows can represent 25–30% of residential heating and cooling energy use, making air control a practical concern. The National Fenestration Rating Council also stresses that U-factor and solar heat gain ratings describe tested conditions, not every installation. Compare those ratings with the local climate and entry orientation. Check wind-load calculations with a qualified professional. Verify maintenance requirements for seals and hardware. Keep the report on file. Standards matter, but field workmanship still decides whether rain stays outside.
A practical selection checklist for comparing tested glass entry-door assemblies and project-specific performance requirements.
| No. | Selection Tip | Performance Dimension | What to Verify | Relevant Datum or Unit | Decision Guidance |
|---|---|---|---|---|---|
| 1 | Confirm the applicable standard and product scope. | Standard identification | Request documentation showing that the complete door assembly was evaluated under the applicable edition of the North American Fenestration Standard/Specification, commonly designated AAMA/WDMA/CSA 101/I.S.2/A440. | Product type, configuration, tested size, standard edition, and performance class or grade. | Do not treat a glass panel, frame, or hardware component as proof of performance for the complete installed assembly. |
| 2 | Compare air-leakage results using the same test basis. | Air infiltration | Check the reported air-leakage rate for the complete door, including the frame, seals, threshold, and operating panel. | Air testing is commonly reported at 75 Pa, equivalent to approximately 1.57 psf; units may include L/s·m² or cfm/ft². | Lower air leakage indicates a tighter assembly. Compare results only when the test pressure, reporting unit, door size, and configuration are comparable. |
| 3 | Verify water resistance at a documented pressure. | Water penetration | Ask for the water test pressure and the test report for the exact door configuration. Confirm that water did not pass beyond the prescribed interior boundary during the test. | Water test pressure is expressed in Pa or psf and is related to the product’s designated performance level or design pressure. | There is no single water-pressure value suitable for every project. Select a tested level that meets the local exposure and project specification. |
| 4 | Match wind performance to the building design pressure. | Structural wind resistance | Review the declared Performance Grade (PG), design pressure, or equivalent structural test result for the complete door assembly. | Pressure is normally stated in psf or Pa. Structural test pressure is higher than the stated design pressure in the applicable test procedure. | Use the project’s code-based design pressure, including location, building height, exposure, wind zone, and opening position. Do not choose a PG from door size alone. |
| 5 | Specify safety glazing for hazardous locations. | Glass safety | Confirm whether the glazing is tempered or laminated safety glass when required by the applicable building and safety-glazing codes. | Safety glazing identification is typically shown by a permanent mark or label; glass thickness alone does not establish safety-glazing compliance. | Use laminated glass where post-breakage retention is important. Verify the required glass type for the door, sidelites, and adjacent glazing separately. |
| 6 | Evaluate thermal values for the full door assembly. | Energy and condensation control | Review whole-door U-factor, solar heat gain coefficient where applicable, and condensation-resistance information rather than relying only on the center-of-glass value. | U-factor is commonly reported in Btu/h·ft²·°F or W/m²·K. Lower U-factor generally means lower heat transfer. | Compare values calculated or tested using the same boundary conditions. Frames, edge spacers, thresholds, and hardware can materially affect the assembly result. |
| 7 | Inspect the threshold and drainage strategy. | Sill and threshold water management | Look for continuous weather seals, positive drainage paths, weep openings where applicable, and a threshold designed for the intended exposure. | Record threshold type, sill height, drainage direction, seal locations, and compatibility with the finished floor. | A water-resistant door still requires a correctly detailed sill pan, flashing, and transition to the surrounding wall system. |
| 8 | Check seals, hardware, and operating forces. | Daily operation and durability | Verify the compatibility of hinges, locks, multipoint hardware, weatherstripping, closers, and the selected panel weight. Confirm smooth operation after installation. | Review the tested operating configuration, hardware type, clearances, and any stated operating-force or durability requirements. | Performance ratings apply to the tested hardware and configuration. Substituting hardware can affect alignment, air sealing, water resistance, and security. |
| 9 | Make sure the test report matches the actual configuration. | Size and configuration limits | Compare the proposed unit with the tested panel count, active and inactive leaves, sidelites, transoms, frame material, glazing type, and maximum tested dimensions. | Document overall width, overall height, panel width, panel height, glass area, frame depth, and configuration. | A rating for a single door does not automatically apply to a larger unit, a paired door, or an assembly with sidelites and transoms. |
| 10 | Require installation details that preserve tested performance. | Installation and field performance | Obtain the manufacturer’s installation instructions, rough-opening requirements, fastener schedule, flashing sequence, sealant requirements, and sill-pan details for the exact assembly. | Verify rough-opening dimensions, shim spacing, fastener locations, sealant type, compatible substrates, and finished-floor elevations. | Air, water, and wind results are laboratory performance data. Incorrect installation, inadequate flashing, or movement at the opening can reduce real-world performance. |
A glass entry door should welcome visitors without weakening your home’s first line of defense. Start with laminated or tempered glass rated for exterior use. Laminated glass holds together after impact, while tempered glass breaks into smaller pieces. Ask for written performance data, not vague claims. Check the frame material, corner joints, and drainage paths. A strong frame cannot compensate for poorly fitted glass.
Hardware deserves the same attention as the door panel. Choose a lock with protected cylinders, reinforced strike plates, and adjustable hinges. Test the handle for smooth movement and firm return. Inspect screws, seals, and threshold height before ordering. Small gaps can admit water and drafts. They are easy to overlook. Security also depends on sightlines, so consider frosted sections or internal blinds where privacy matters.
Read the warranty carefully, including glass breakage, finish fading, hardware failure, and installation coverage. Confirm who handles service calls and how quickly problems are reviewed. Professional installation should follow local building requirements and the manufacturer’s written tolerances.
The installer should measure the opening twice, check the wall for movement, and seal the perimeter continuously. Request proof of insurance, relevant training, and a detailed completion report.
I would not rely on a polished showroom alone; my own rushed measurement once caused an avoidable delay. A second inspection is worthwhile, especially when the entrance faces heavy rain or strong afternoon sun.